How to use webmail in outlook

How to use webmail in outlook
Using webmail in Outlook is easy. First, open Outlook and select "Add Account," then enter your email address and password. Outlook will attempt to set up the connection automatically. If necessary, you can manually configure the incoming (IMAP/POP) and outgoing (SMTP) server settings. Once you've completed the setup, you'll be able to send and receive emails through your webmail conveniently within Outlook. However, if you'd like a step-by-step tutorial, read the article below.
How to set up webmail in outlook
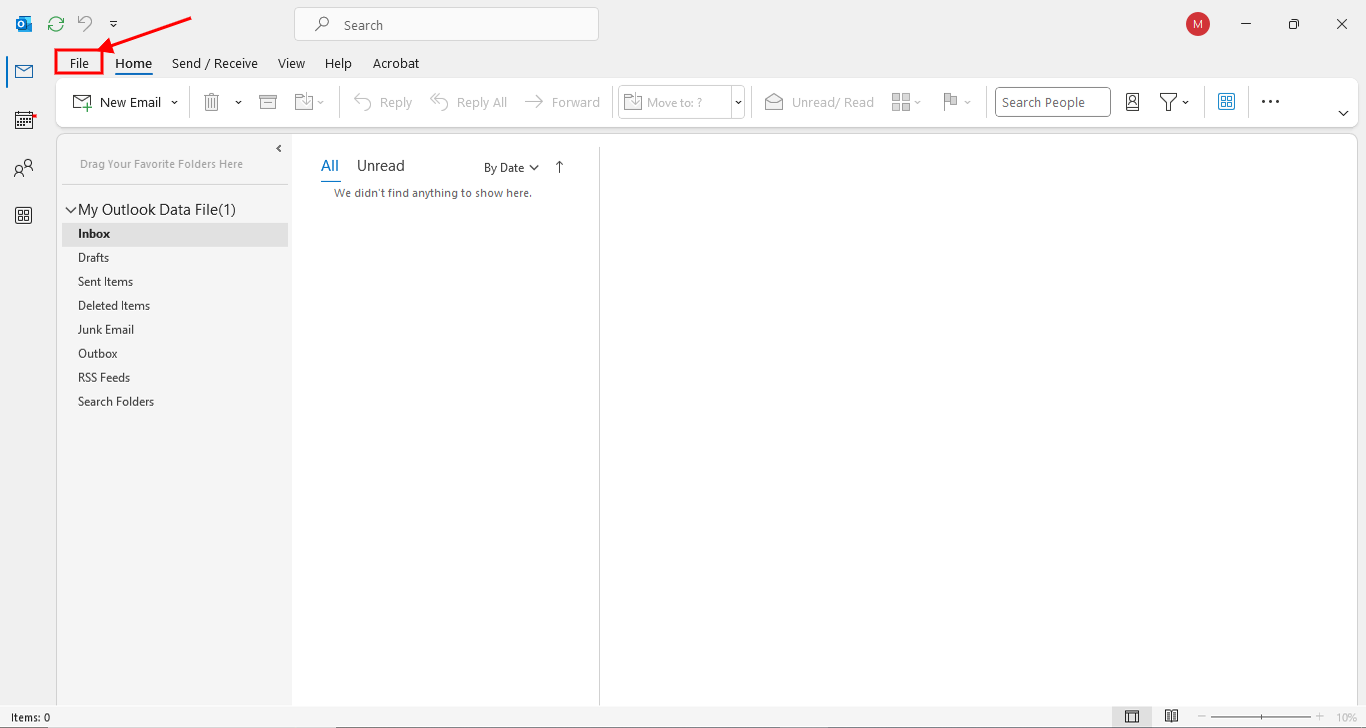
First, you have to download the outlook program. Then this window will appear. Click on file as the red arrow points in the red frame.
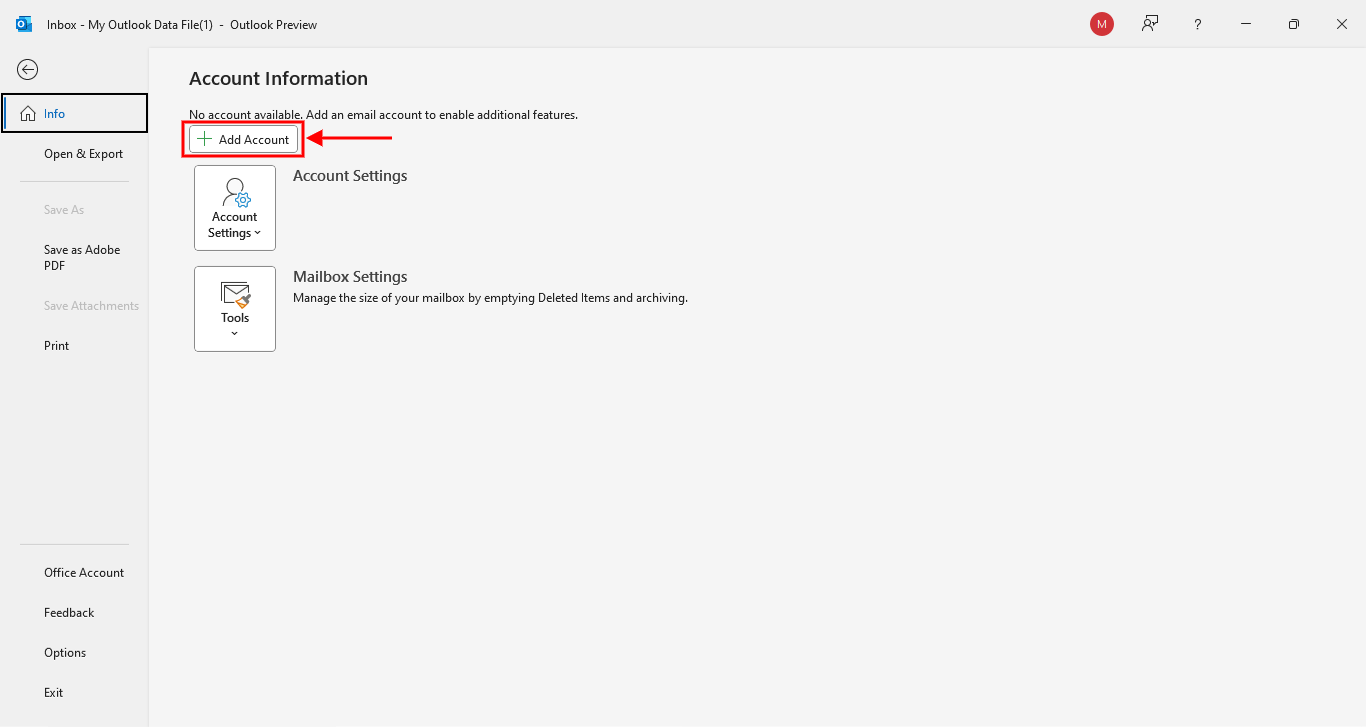
Then click on add account as shown in the red box with an arrow pointing at it.
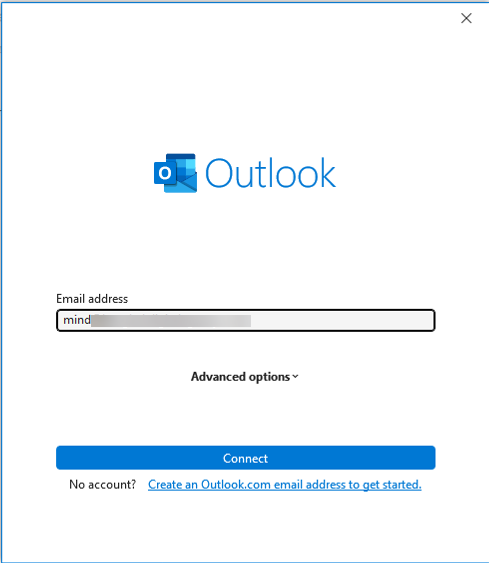
After that, a window will appear like this. Enter your email address with your own domain before pressing connect.
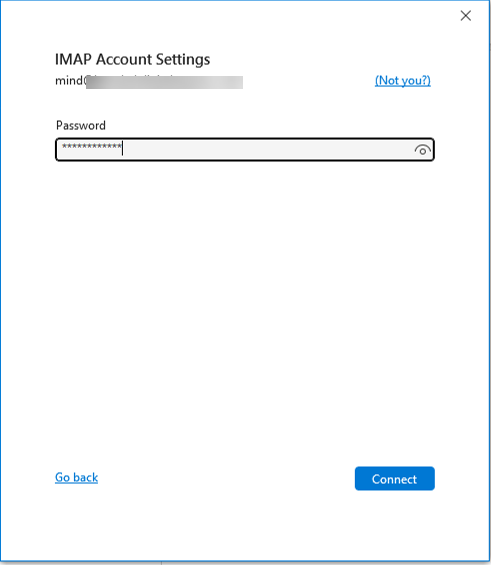
Then enter the code and press connect.
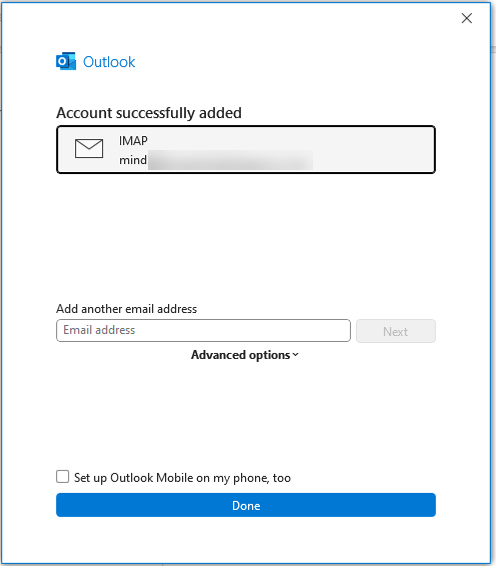
 If it appears as shown in the image below, it means that you have successfully logged in. Then press the Done button.
How to use outlook
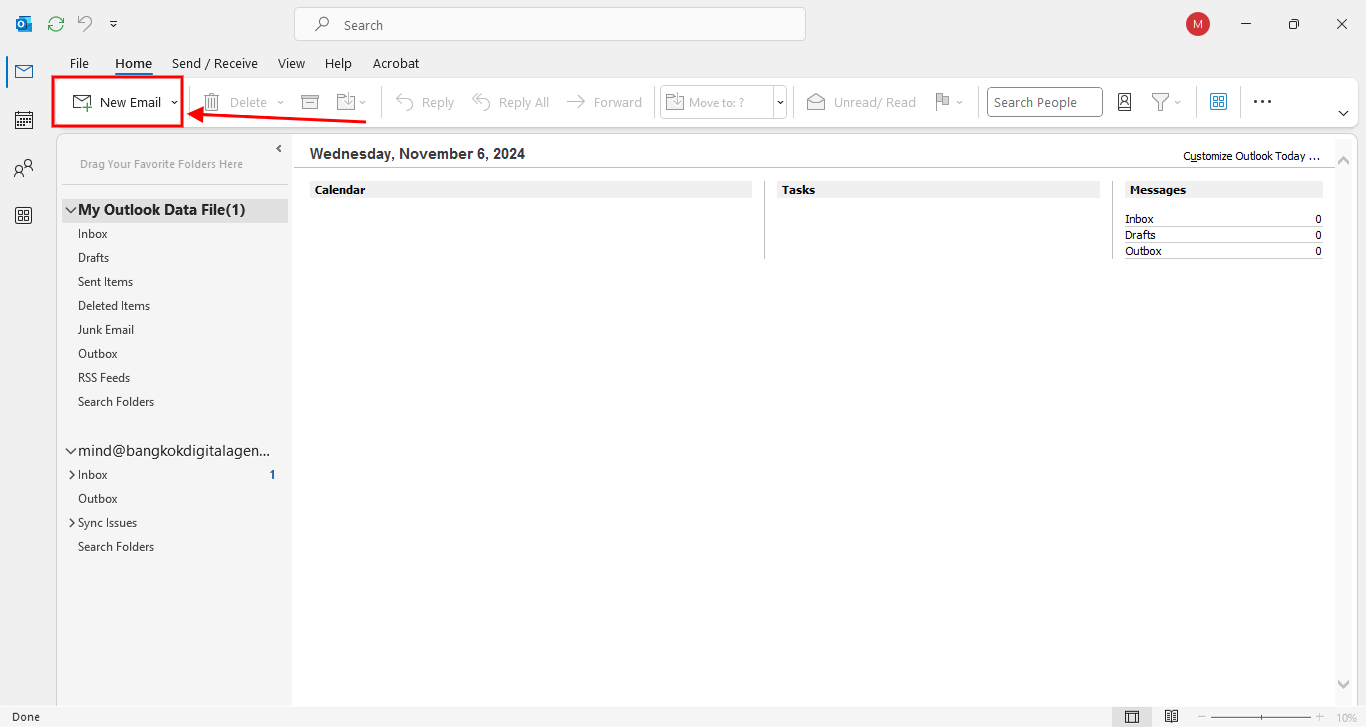
The next step is to compose a message in Outlook by clicking on the New Email button with a red frame as indicated by the arrow.
Next, on this page, there will be fields to fill in, arranged by subject as follows:
Number 1, the to field is for filling in the recipient's email.
Number 2, the cc field is for filling in the email to send a copy to other recipients, but they do not have to reply.
Number 3, the subject field is the topic of this email.
Number 4 is the field for entering the message or details of the information for this email.
The red frame above is a gimmick for changing the letter, such as changing the text color, making it bold, italic, highlighting various characters. But the paperclip icon that the red arrow is pointing to is for attaching files.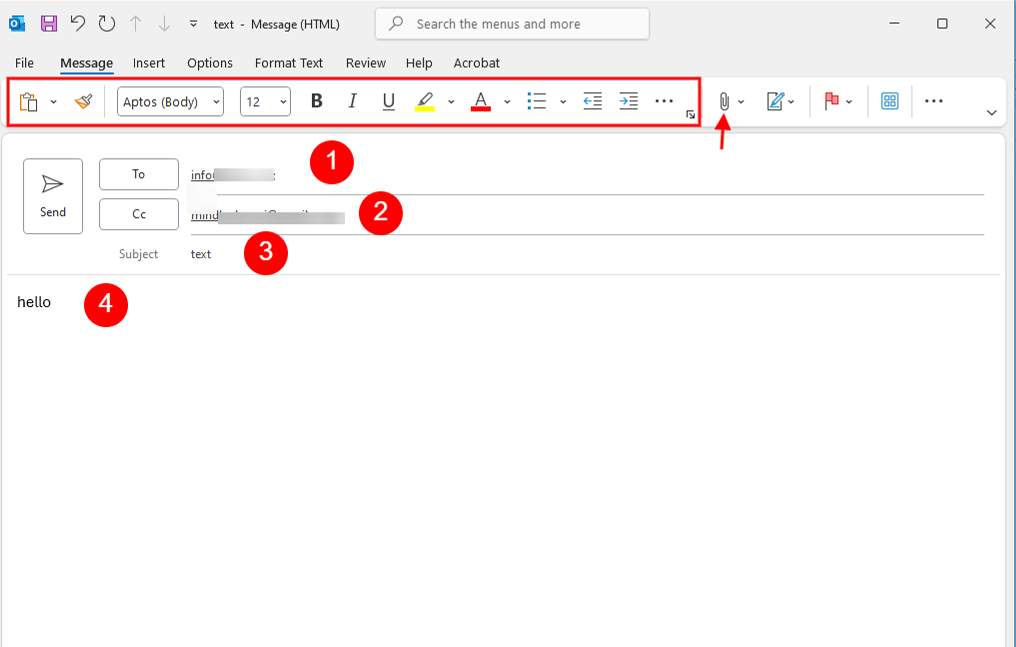
How to set up outlook signature
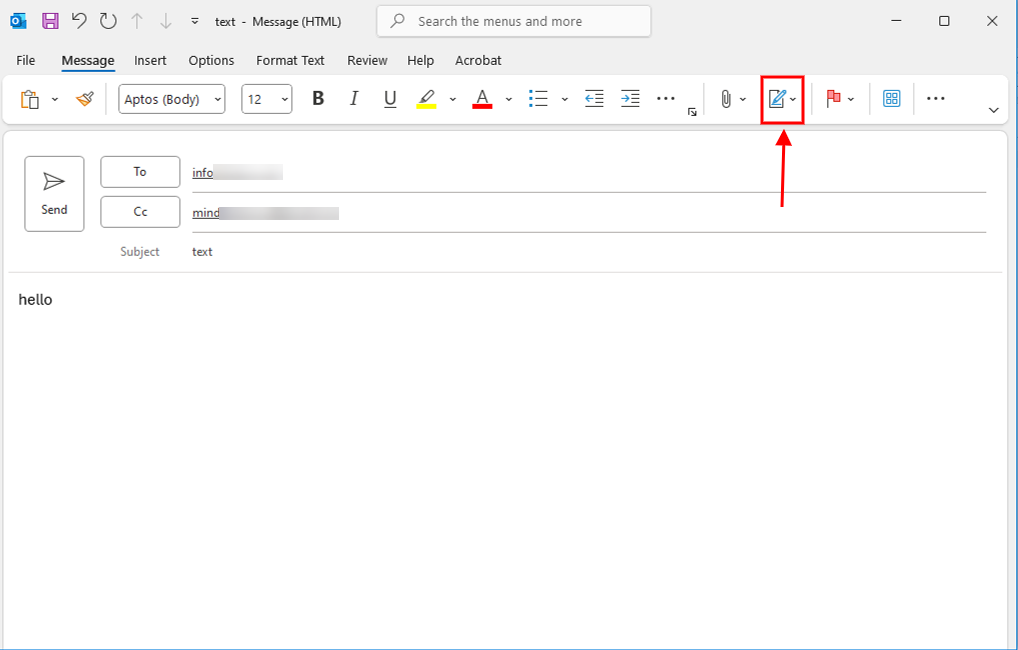
Next, we will use the signature feature by clicking on the paper and pencil icon with the red frame and arrow pointing to it.
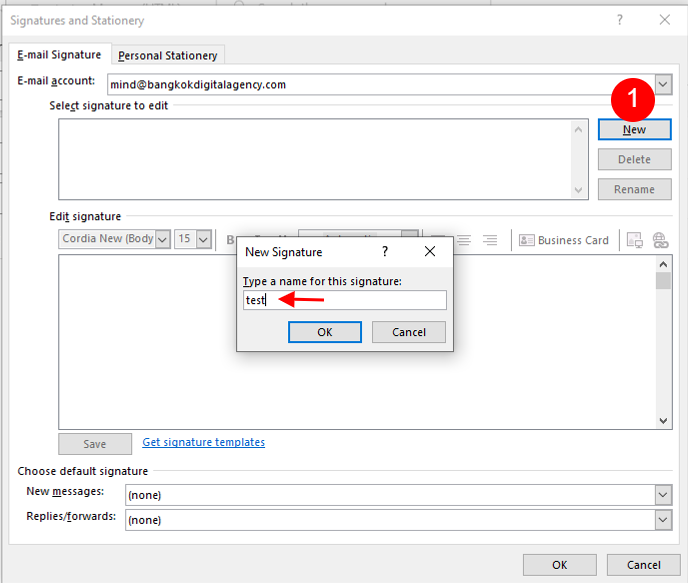
 A new window will appear. Click on New as shown in number 1 and it will ask you to enter a signature name. You can enter anything you want. Then click OK.
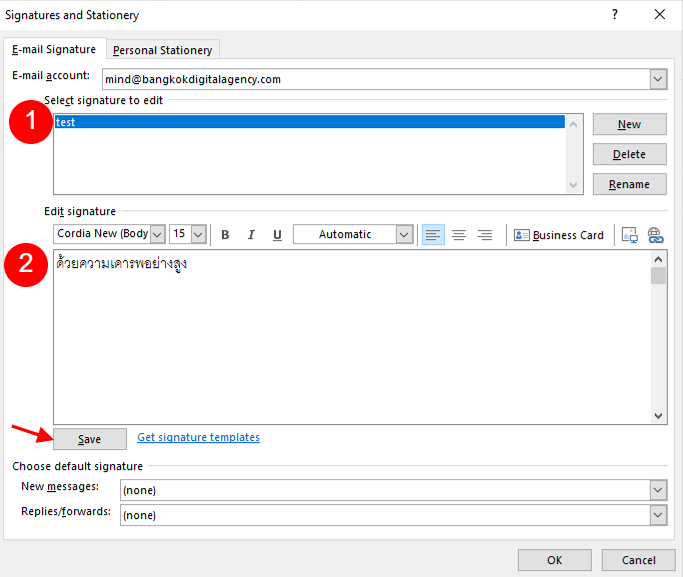
For number 1 is the box for selecting the signature name. If we set a lot, there will be names to choose from for use in various formats.
Number 2 is the box for writing the final message, such as With great respect, etc.
Then press the red arrow which is the save button.
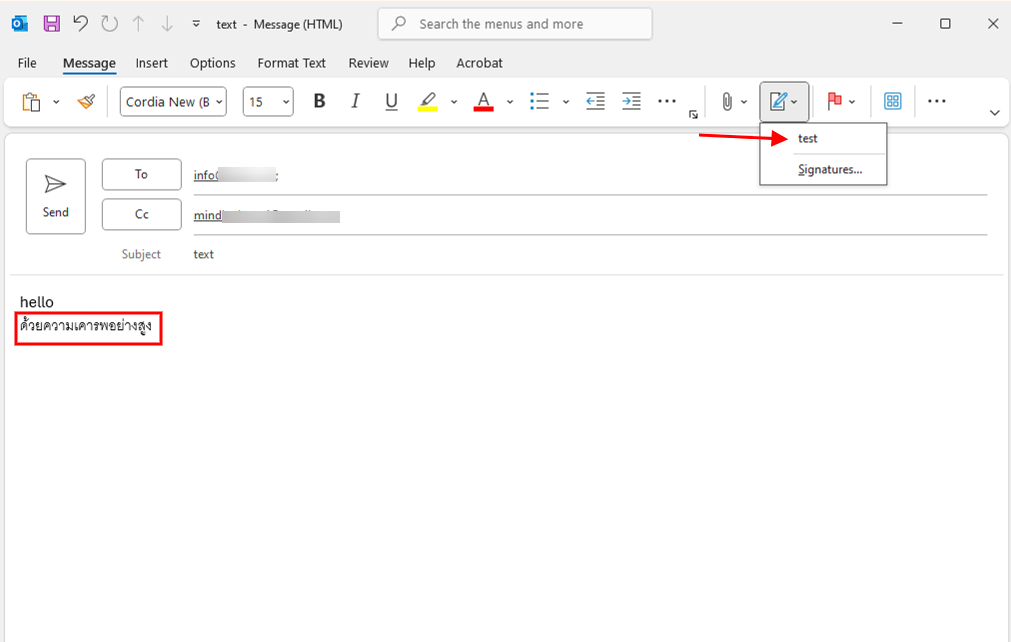
 The method of use is to click on the same pencil icon and select the signature name that we set as indicated by the red arrow. For example, in this case, we set it as test and the message will appear in the red frame as shown in the image below.
 For anyone who has additional questions, please feel free to ask more if you don't understand anything.

