How to use webmail in thunderbird

How to use webmail in thunderbird
Using webmail in Thunderbird is easy.
First, add your email account in Thunderbird through the "New Account" menu and fill in your email and password. The program will automatically detect the server settings, or you can configure the incoming (IMAP/POP) and outgoing (SMTP) servers yourself. Once connected, you can manage your email, send and receive messages via webmail conveniently within Thunderbird. But if you want to read a step-by-step tutorial, read the article below.
How to set up Thunderbird
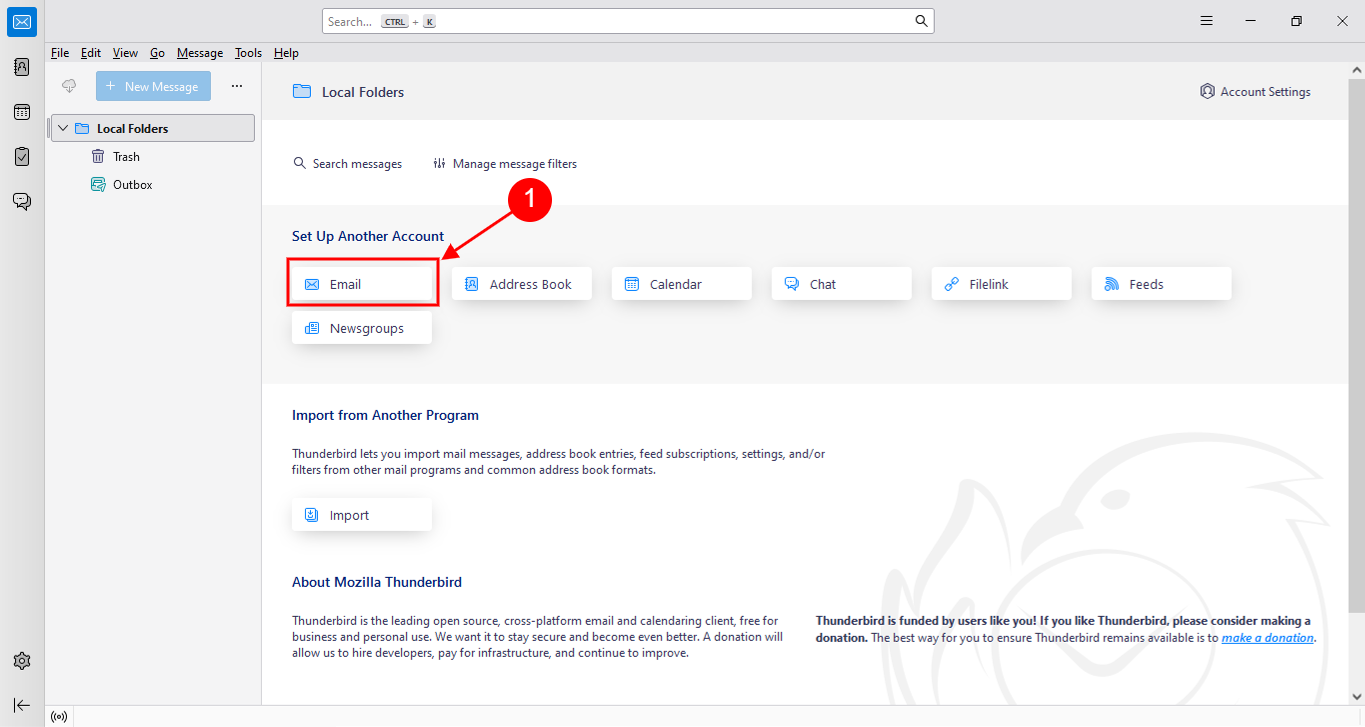
The first step to using webmail on thunderbird is that everyone must download the thunderbird program first. And then click into the program. And the program screen will appear as shown in the picture below.
Then click on the word Email that appears in the red frame as indicated by arrow number 1.
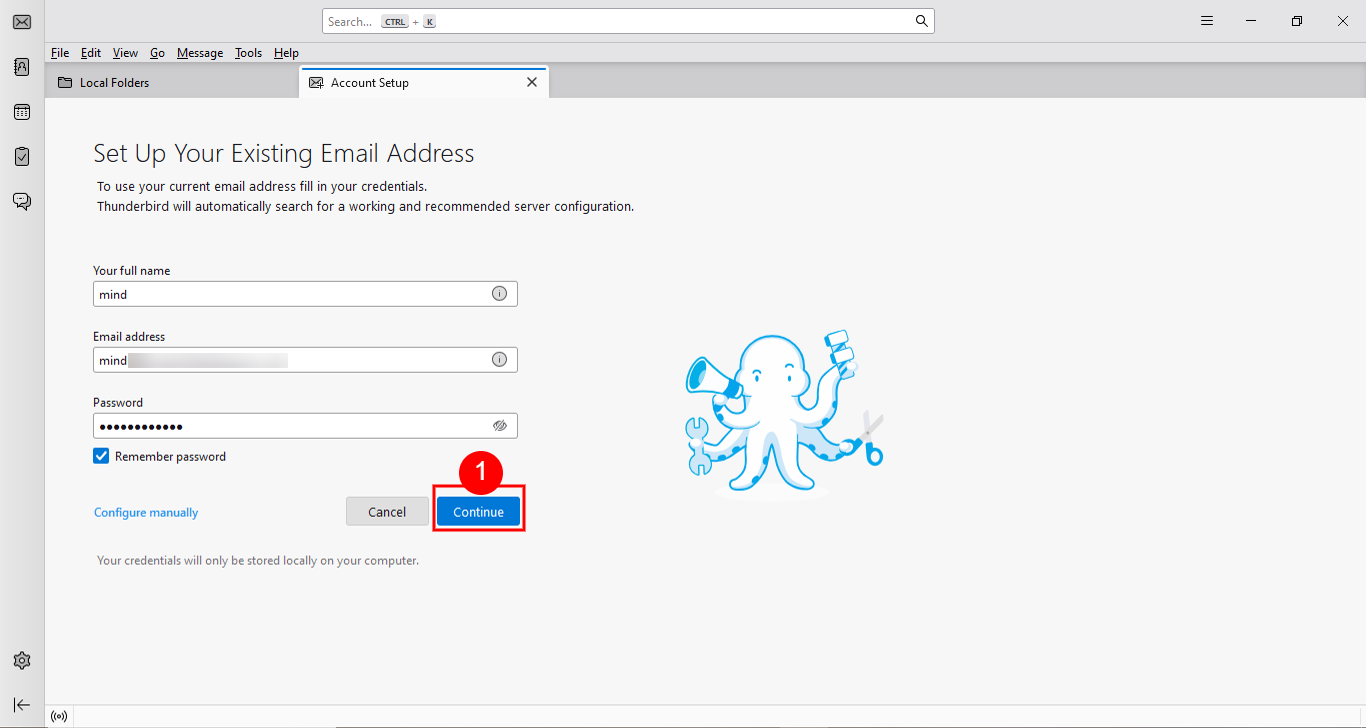
After that, it will come to the information filling page. Enter your name and email which is your own domain name and password. Then press Continue according to the red box in number 1.
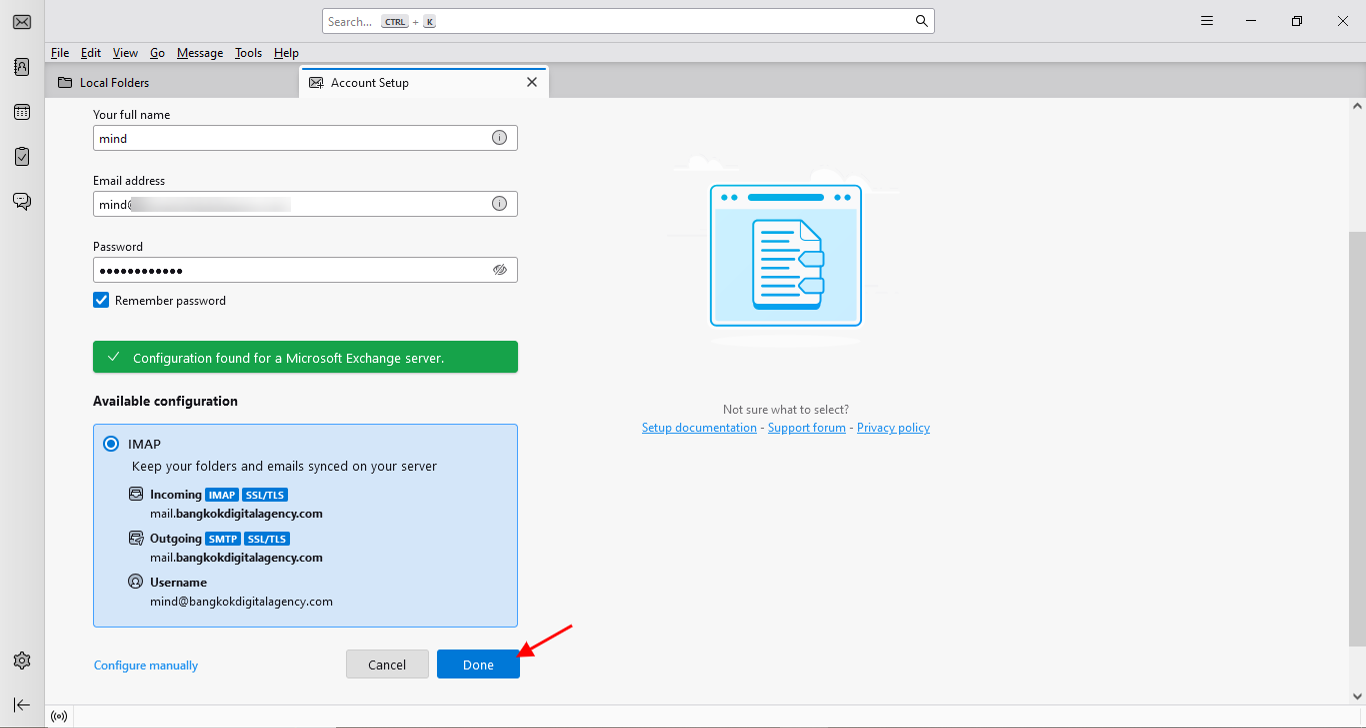
Then it will show the protocol we selected, for example for this email we use IMAP which is better than POP3 because our data will be stored on the server. We can change the account to use on other devices such as phones or tablets. Then we press Done as the red arrow points and it is done.
How to use Thunderbird
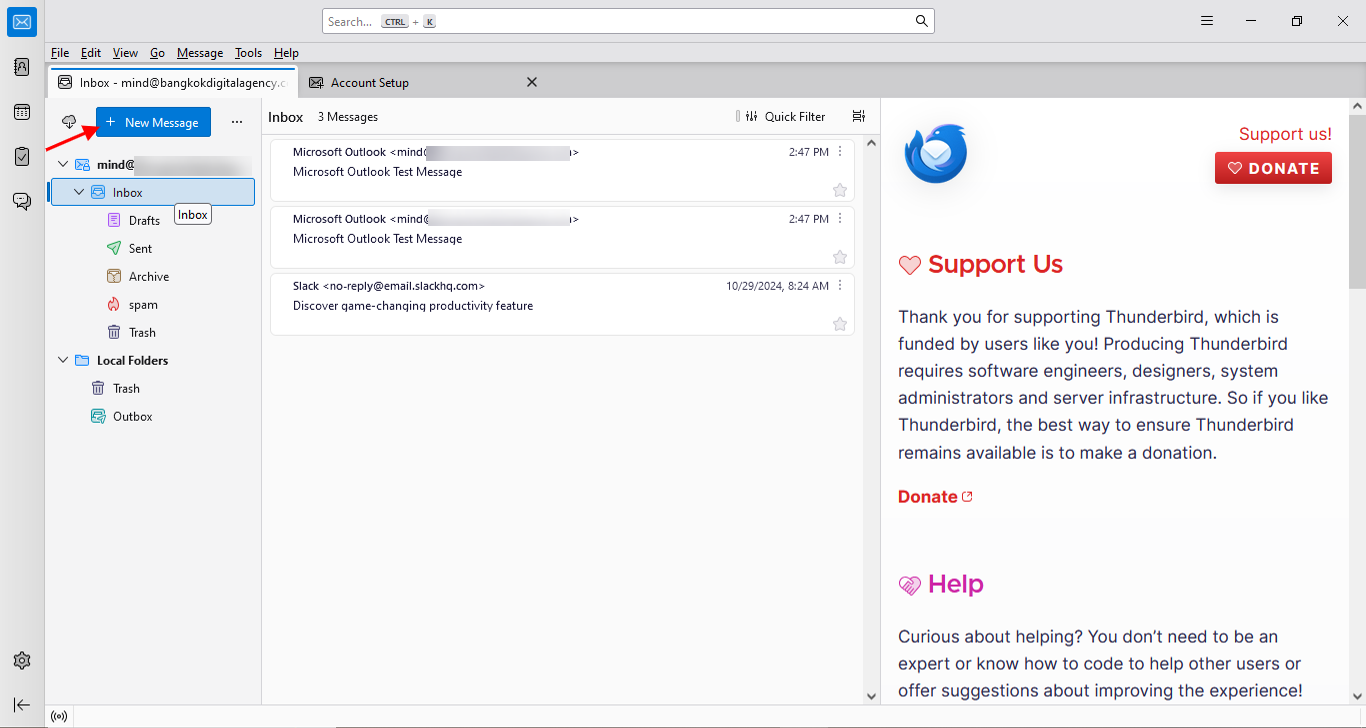
Now our login to Thunderbird is complete. After this, we will teach you the basic usage, starting with sending a message by clicking on the blue button at the top as indicated by the red arrow that says New massage.
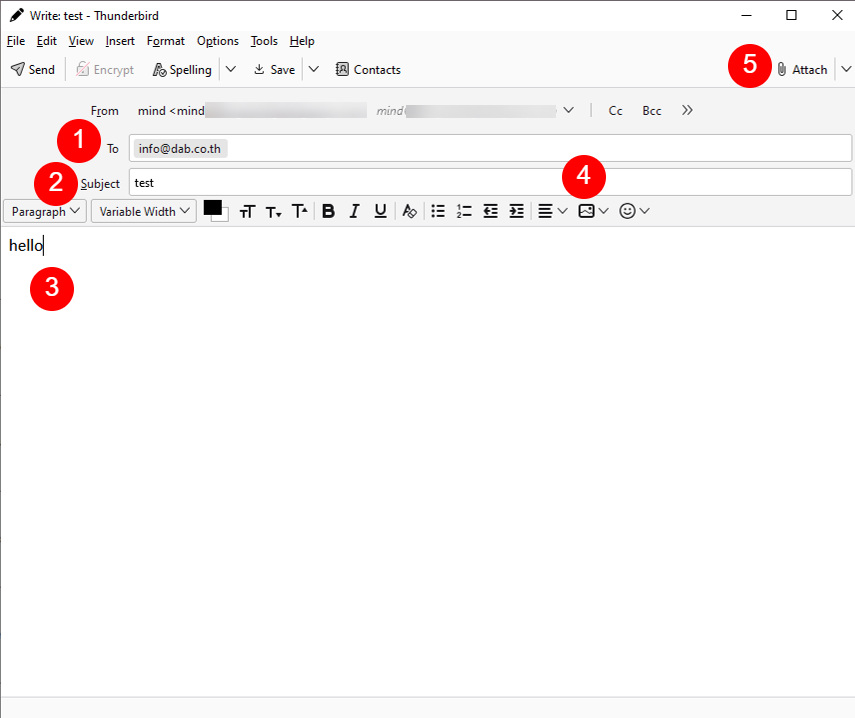
Then it will enter the window for composing a letter in the following order:
Number 1 for entering the recipient's email address
Number 2 for entering the subject
Number 3 for entering the message, information, or details
Number 4 for attaching images
Number 5 for attaching various files
You can use the above tricks to make the front letters, italic, underline, arrange the letters, change the font as you wish
How to set up Thunderbird Signature
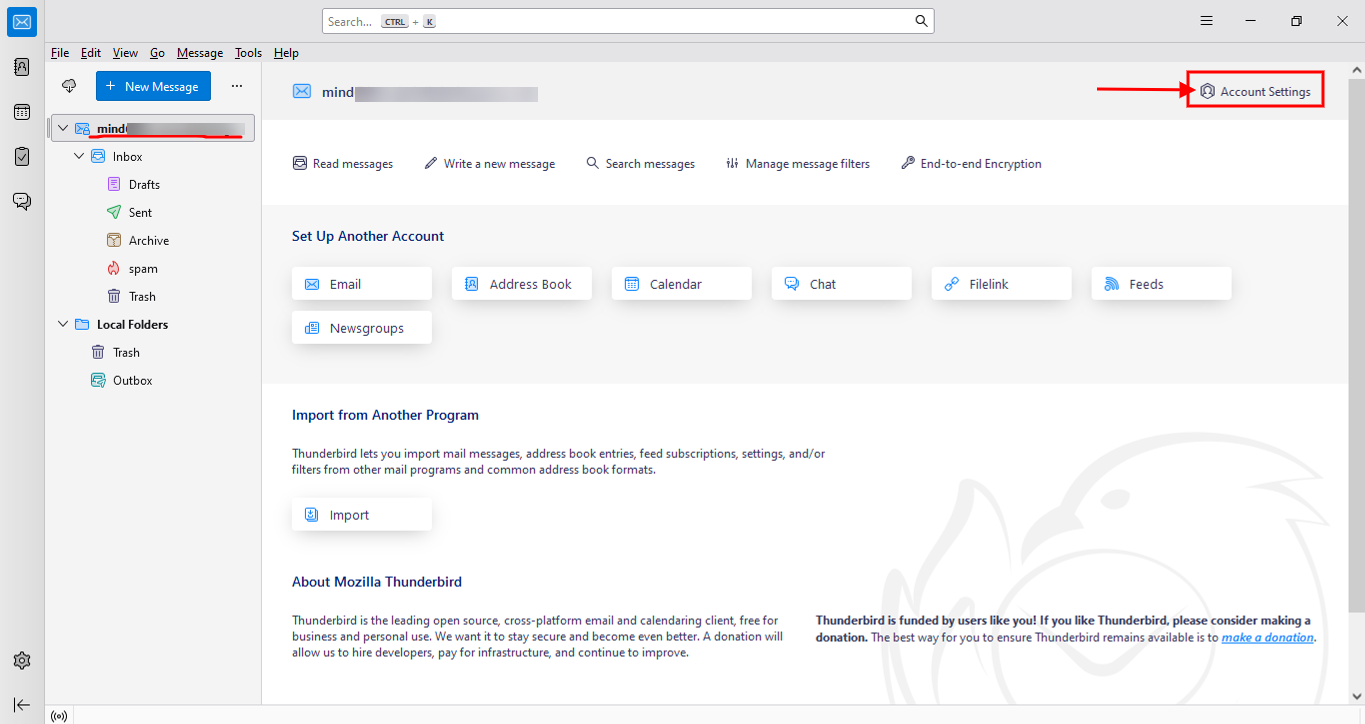
Next, we will teach you how to use the signature text feature to add a message to the end of your letter. First, go back to your domain name page as underlined in red and click on Account Setting as shown in the red box with an arrow.
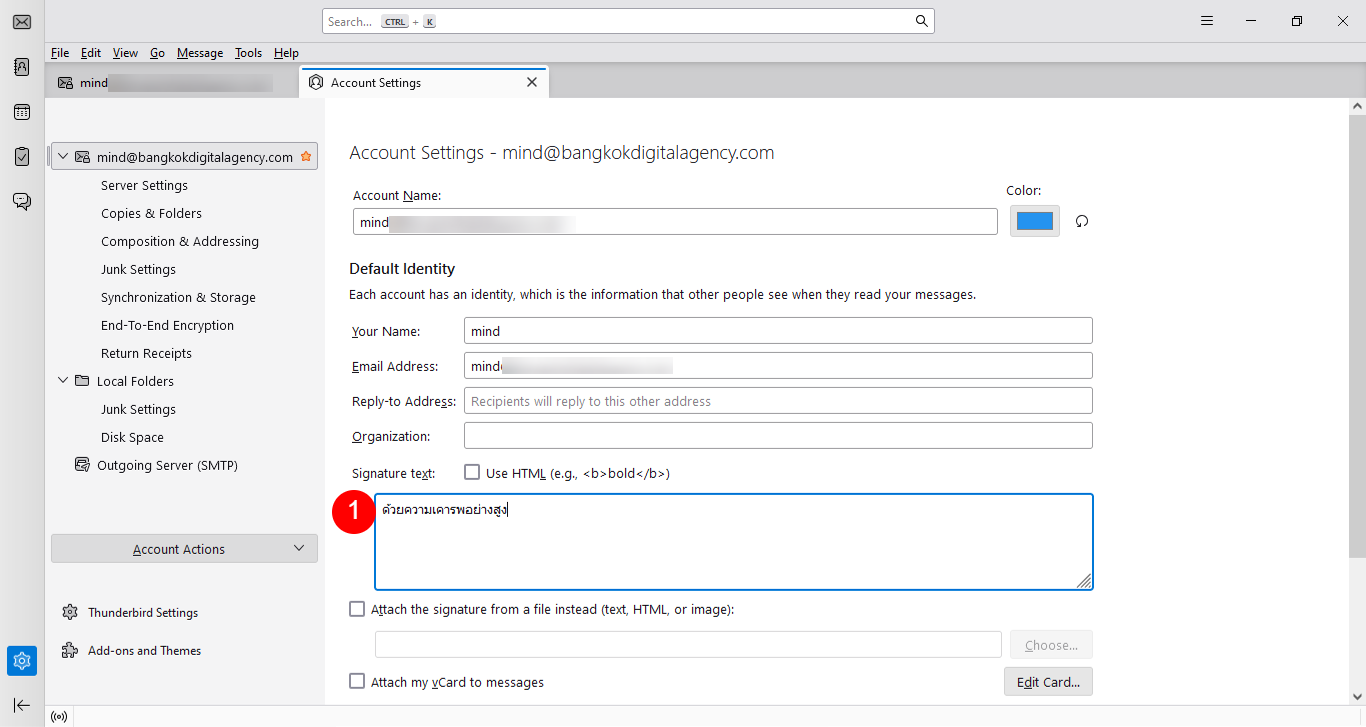
After that, a window will appear as shown in the image below. Enter the final message in the signature text as shown in number 1.
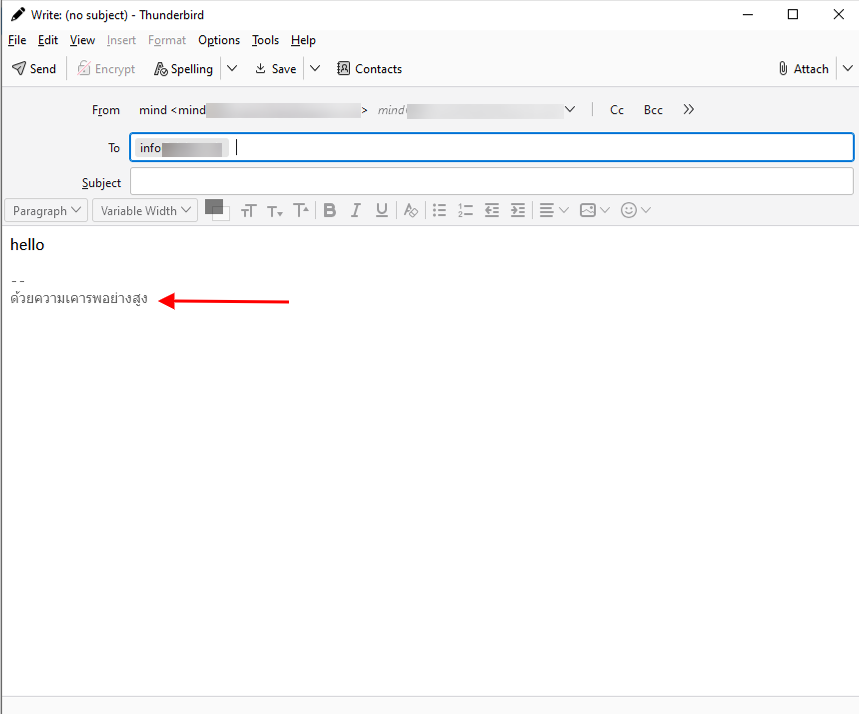
Then the result will appear in the text input window as shown in the image below, which will appear where the red arrow is pointing.
For anyone who has additional questions, please feel free to ask more if you don't understand anything.

